
Introduction: This guide gives step by step instructions detailing how to convert a video file into a DC_DivX compatible video file by using the VirtualDub program. Screen captures are presented for some of the steps to serve for visual reference.
Step1: Download and Install the DivX Codec. Download VirtualDub.
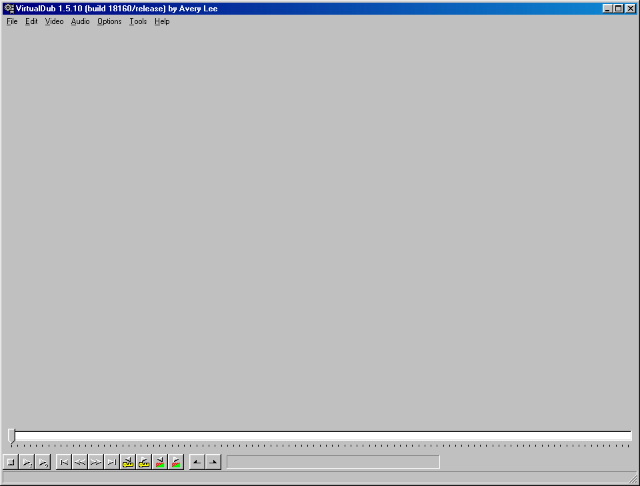
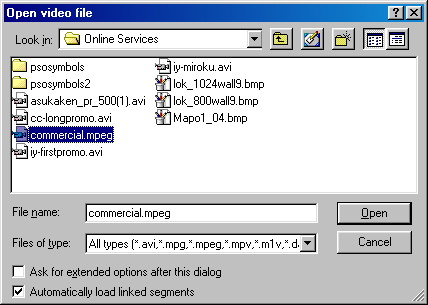
Step2: Start VirtualDub. Click "File", then select "Open video file...". In the small window that pops up find the video file you wish to convert,
and then select it. At this point the first frame of the video you've selected will be displayed in the main Virtual Dub window.
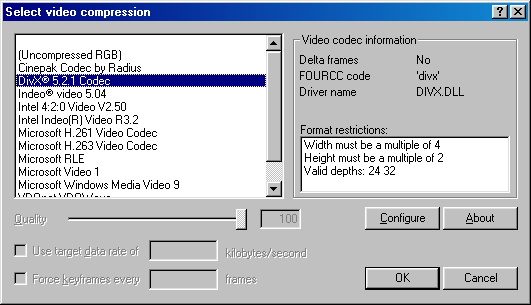
Step 3: Click "Video", then select "Compression". The "Selecet video compression" window will now pop up. Locate and select "DivX Codec" from the
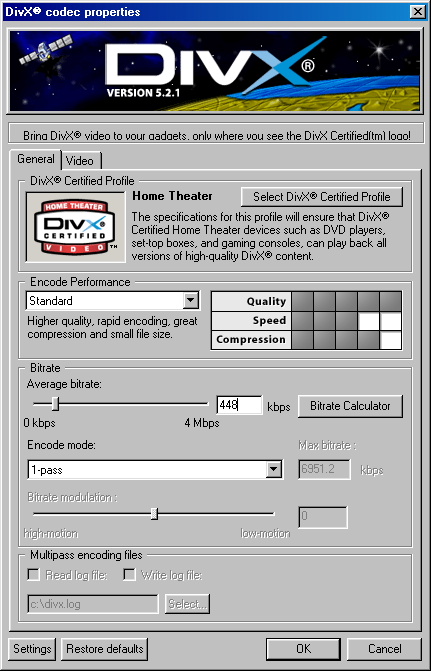
codec list and then click the "Configure" button. The "DivX codec properties" window will now pop up. Time to change the bitrate. (Note: The version of
DivX and the general appearance of the "DivX codec properties" window on your computer may vary from what is pictured in this guide.)
Step 4: Changing the bitrate. Always use a bitrate divisible by eight. If the bitrate is set to high then the video will freeze occassionally during playback
on the Dreamcast. The following suggested bitrates are the discovered results from weeks of extensive testing on dozens of various types of video files.
Despite that, each video file varies and you may find that a video file you have will run smoothly on a higher bitrate than suggested or that it
requires a lower bitrate.
Change the bitrate to 400 kbps to 448 kbps if the video file meets any one or more of these three criteria: animated, Full Frame (4:3 or 1.33:1 aspect
ratio), or higher framrate than 24/fps.
Change the bitrate to 448kbps to 504 kbps if the video file is in Letter Box widescreen (1.85:1 aspect ratio) format running at 24/fps or slower.
Change the bitrate to 504kbps for Anamorphic widescreen (2.35:1 aspect ratio) videos running at 24/fps or slower.
Step 5: If the resolution of the video you're converting is 320x240 or smaller then skip to the next step. If the resolution of the video you're
converting is greater than 320x240 then you must resize it to an aspect ratio of 320x(variable). "320x240" Is the resolution dimensions in the "Width x
Height" format.
Click "Video", then select "Filters". The "Filters" window will now pop up. Click the "Add" button and the "Add Filters" window will pop up. Now you
have a choice depending on the file.
If the resolution is 640x(variable), then select "2:1 reduction (high quality)" and then click the "OK" button.
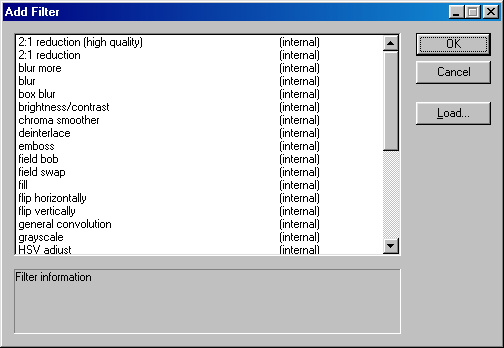
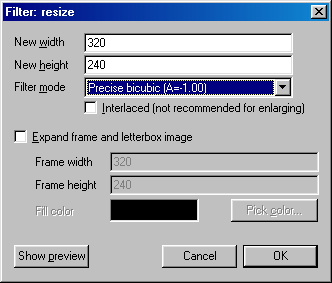
For all other resolutions, select "resize" and then click the "OK" button. The "Filter: resize" window will now pop up. In the "Filter mode" box select
"Precise bicubic (A=1.00)". Calculate and input the new width and height. The new width and height resolutions must be numbers divisible by four. It is very
important to maintain the original aspect ratio. You may want to use a calculator to verify that the resize changes are correct before proceeding.
Step 6: Click "Audio" and then select "Full processing mode".
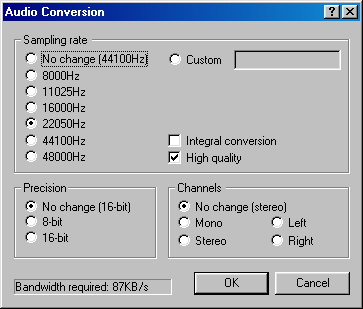
Step 7: Click "Audio", then select "Conversion". The "Audio Conversion" window will now pop up. If the Sampling rate reads as "No change
(22050Hz)", or an even lower value, then you may click the "Cancel" button and skip to the next step. If the "No change" value is higher than 22050Hz, select
both "22050Hz" and "High quality", then click the "OK" button.
Step 8: Click "Audio", then select "Compression". The "Selecet audio compression" window will now pop up. Select the "MPEG Layer-3" audio
codec. Now, this part will depend on whether the original audio is Stereo or Mono.
If the Audio is Stereo, as is the example file, you may select up to "56 kBit/s, 22,050Hz, Stereo 7KB/s".
If the audio is Mono you may select up to "32 kBit/s, 22,050Hz, Mono 4KB/s"
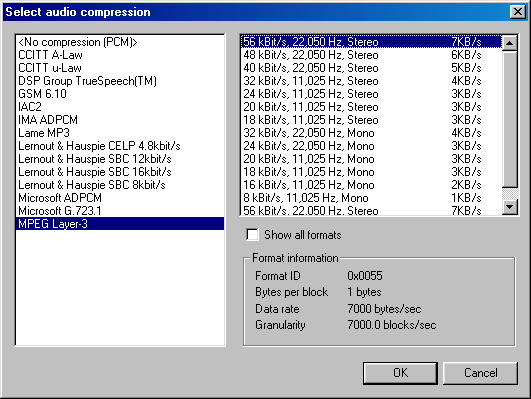
Now, click the "OK" button.
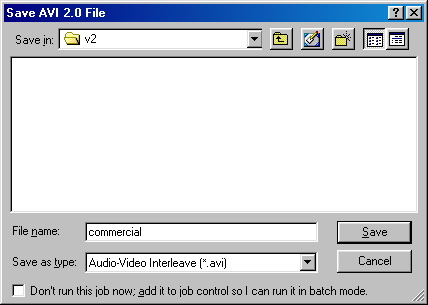
Step 9: Click "File" and then select "Save as AVI". The "Save AVI 2.0 File" window will now pop up. Select the folder you wish to save the video
file to, name the file, and click the "Save" button.
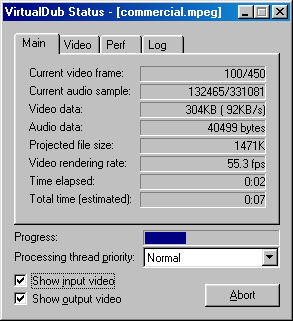
Step 10: The "VirtualDub Status" window will now appear and display the progress of the file creation. The ammount of time it takes to create a
file will depend on the individual file itself as well as the computer. Once VirtualDub has finished converting the file the "VirtualDub Status" window
will close.
Step 11: Congratulations! You've finished making a DC_DivX compatible video file.
The names DivX, VirtualDub, and DC_DivX are all copyrighted by their respected owners. "The DC_DivX Guide: Using VirtualDub" was inspired by "Dc-DivX 4 Dummies" by ZacMc. The DC_DivX Guide copyright 2006 - 2016 by game player s. Hosted and maintained exclusively at PSO Archive.